[05] 텍스쳐링
Tutorial 5: Texturing
Tutorial 5: Texturing This tutorial will explain how to use texturing in DirectX 11. Texturing allows us to add photorealism to our scenes by applying photographs and other images onto polygon faces. For example, in this tutorial we will take the following
www.rastertek.com
DirectX11의 공부 목적으로 위 링크의 튜토리얼을 보고 제 생각을 포함하여 정리하였습니다.
들어가며
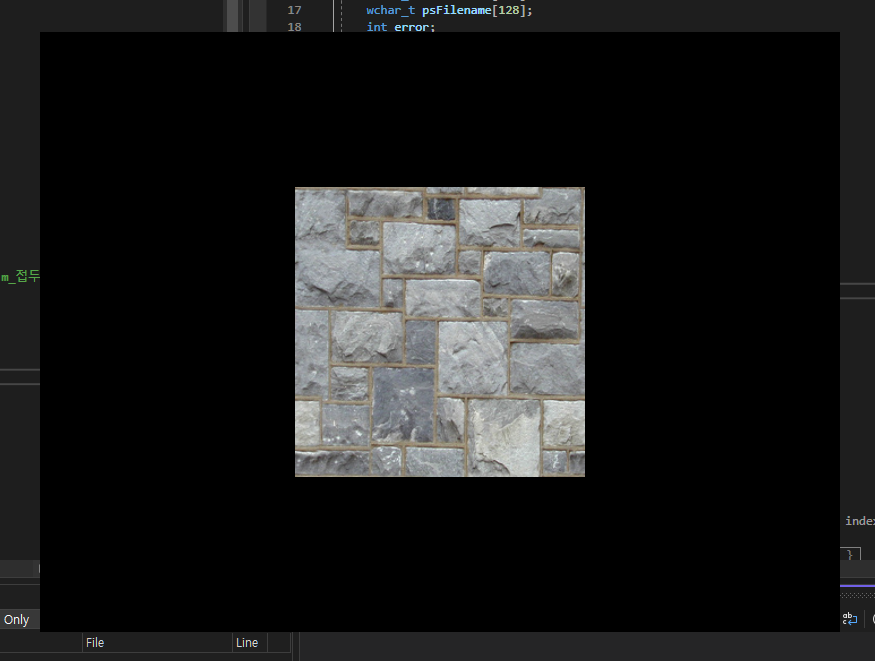
이 튜토리얼에서는 DirectX11에서 텍스처링을 사용하는 방법을 설명합니다.
다음 이미지를 사용합니다.
그 후 이전 튜토리얼에 생성했던 삼각형에 적용합니다.
우리가 사용할 텍스처의 형식은 .tga파일 입니다.
코드에 들어가기 전에 텍스처 매핑이 어떻게 작동하는지 알아야합니다.
이미지의 픽셀을 폴리곤으로 매핑하기 위해 우리는 텍셀 좌표계를 사용합니다. 이 좌표계는 픽셀로 된 텍스쳐의 크기를 0.0f 에서 1.0f 사이의 값으로 정규화 하여 사용합니다.
예를 들어 텍스쳐 너비가 256픽셀인 경우 첫번째 픽셀은 0.0f로 매핑되고, 256번째 픽셀은 1.0f로 매핑됩니다.
128번째인 중간 픽셀은 0.5f로 매핑됩니다.
텍셀 좌표계에서 가로 길이는 "U" 이고 세로 길이는 "V" 입니다.
이번 튜토리얼의 업데이트 된 프레임 워크 입니다
이전 튜토리얼 이후 프레임 작업에 대한 변경 사항은 ModelClass 내부에 TextrueClass와 ColorShaderClass를 대체하는 TextureShaderClass가 생겼습니다.
새로운 TextureShaderClass의 코드를 살펴보는 것으로 시작하겠습니다.
Texture.vs
이전시간과는 달리 정점 데이터의 유형에 색상을 사용하지 않고 텍스쳐 좌표를 사용합니다.
텍스쳐 좌표는 U와 V, 부동 소수점 두 개로 float2를 사용합니다.
텍스쳐 좌표의 의미를 가진 시멘틱은 TEXCOORD0입니다. 여러 텍스쳐 좌표가 허용되므로 0을 다른 숫자로 변경 가능합니다.
cbuffer MatrixBuffer
{
    matrix worldMatrix;
    matrix viewMatrix;
    matrix projectionMatrix;
};

struct VertexInputType
{
    float4 position : POSITION;
    float2 tex : TEXCOORD0;
};

struct PixelInputType
{
    float4 position : SV_POSITION;
    float2 tex : TEXCOORD0;
};


PixelInputType TextureVertexShader(VertexInputType input)
{
    PixelInputType output;

    // 행렬변환을 위해 마지막 벡터를 1.0f로 변경
    input.position.w = 1.0f;

    // 공간 변환
    output.position = mul(input.position, worldMatrix);
    output.position = mul(output.position, viewMatrix);
    output.position = mul(output.position, projectionMatrix);

    // 픽셸 세이더의 텍스쳐 좌표 저장
    output.tex = input.tex;

    return output;
}
Texture.ps
이번 픽셀 셰이더에는 두 개의 전역변수가 있습니다.
첫 번째는 텍스쳐 리소스인 Texture2D ShaderTexture입니다. 이는 모델에서 텍스쳐를 렌더링하는데 사용되는 텍스쳐 리소스가 됩니다.
두 번째는 SmaplerState SampleType입니다. SamplerState은 텍스쳐의 특정위치에서 어떻게 색을 가져오는지 방법을 정의하는 설정입니다.
예를 들어 256 * 256 픽셀의 텍스쳐를 적용시킬 폴리곤이 카메라와 멀리 떨어져 있어서 화면에서 8픽셀만 구성되는 경우, SamplerState를 사용하면 설정 값에 따라 그려질 픽셀의 색상을 결정합니다.
우리는 TextureShaderClass에서도 샘플러 상태를 정의한 다음, 이 픽셀 셰이더가 사용할 수 있도록 리소스 포인터에 이를 연결할 것입니다.
Texture2D shaderTexture : register(t0);
SamplerState SampleType : register(s0);

struct PixelInputType
{
    float4 position : SV_POSITION;
    float2 tex : TEXCOORD0;
};

float4 TexturePixelShader(PixelInputType input) : SV_TARGET
{
    float4 textureColor;

    // Sample the pixel color from the texture using the sampler at this texture coordinate location.
    textureColor = shaderTexture.Sample(SampleType, input.tex);

    return textureColor;
}
TextureShaderClass.h
이 클래스는 이전 튜토리얼의 ColorShaderClass의 업데이트 버전입니다.
추가된것은 private의 ID3D11SamplerState의 포인터가 추가되었습니다.
ID3D11SamplerState* m_sampleState;
TextureShaderClass.cpp
1. Initialize
새로운 셰이더 파일의 이름을 기술합니다.
bool TextureShaderClass::Initialize(ID3D11Device* device, HWND hwnd)
{
	bool result;
	wchar_t vsFilename[128];
	wchar_t psFilename[128];
	int error;

	///////////////////////////////////////////////////////////////////
	// 셰이더의 파일이름 하드코딩후 저장
	///////////////////////////////////////////////////////////////////
	error = wcscpy_s(vsFilename, 128, L"Texture_VS");
	error = wcscpy_s(psFilename, 128, L"Texture_PS");


	///////////////////////////////////////////////////////////////////
	// 셰이더 생성후 초기화
	///////////////////////////////////////////////////////////////////
	InitializeShader(device, hwnd, vsFilename, psFilename);

	return true;
}
2. Render
Render함수는 이제 텍스쳐 리소스에 대한 포인터인 texture라는 새 매개변수를 사용합니다. 이 포인터는 SetShaderParameters 함수로 전달되어 셰이더에 텍스쳐가 설정됩니다.
bool TextureShaderClass::Render(ID3D11DeviceContext * deviceContext, int indexCount, XMMATRIX worldMatrix, XMMATRIX viewMatrix,
	XMMATRIX projectionMatrix, ID3D11ShaderResourceView * texture)
{
	bool result;

	// Set the shader parameters that it will use for rendering.
	result = SetShaderParameters(deviceContext, worldMatrix, viewMatrix, projectionMatrix, texture);

	// Now render the prepared buffers with the shader.
	RenderShader(deviceContext, indexCount);

	return true;
}
3. InitializeShader
새로운 셰이더를 설정합니다.
	// Texture sampler에 대한 설명을 담는 새로운 변수 추가
	D3D11_SAMPLER_DESC samplerDesc;

	/*----------------------------------------------*/
	// 셰이더 파일 컴파일, 생성 부분
	/*----------------------------------------------*/
이제 정점 데이터에 색상대신 텍스쳐 요소가 있으므로 Input layout이 변경되었습니다. 첫 번째 위치 요소는 동일하지만 두 번째 요소의 SemanticName과 Format은 변경되었습니다.
	/*----------------------------------------------*/
	// polygonLayout[0] 생성
	/*----------------------------------------------*/

	polygonLayout[1].SemanticName = "TEXCOORD";
	polygonLayout[1].SemanticIndex = 0;
	polygonLayout[1].Format = DXGI_FORMAT_R32G32_FLOAT; // float2(u, v좌표)
	polygonLayout[1].InputSlot = 0;
	polygonLayout[1].AlignedByteOffset = D3D11_APPEND_ALIGNED_ELEMENT;
	polygonLayout[1].InputSlotClass = D3D11_INPUT_PER_VERTEX_DATA;
	polygonLayout[1].InstanceDataStepRate = 0;

	// Get a count of the elements in the layout.
	numElements = sizeof(polygonLayout) / sizeof(polygonLayout[0]);

	// Create the vertex input layout.
	result = device->CreateInputLayout(polygonLayout, numElements, vertexShaderBuffer->GetBufferPointer(),
		vertexShaderBuffer->GetBufferSize(), &m_layout);

	/*----------------------------------------------*/
	// 상수 버퍼 생성
	/*----------------------------------------------*/
이후 Sampler state의 설명이 설정됩니다. 이후에 픽셀 셰이더에 전달됩니다.
Sampler state에서 가장 중요한 요소는 Filter 입니다. Filter는 폴리곤에 텍스쳐의 최종 모양을 만들기 위해 어떤 픽셀을 사용하거나 결합할지의 방법을 정합니다.
이번 시간에서는 처리 비용이 비싸지만 최상의 시각적 결과를 제공하는 D3D11_FILTER_MIN_MAG_MIP_LINEAR을 사용해 축소, 확대 및 mip level sampling을 위해 선형 보간을 사용하도록 지시합니다.
AddredssU와 AddressV는 좌표가 0.0f와 1.0f 사이에 유지되도록 보장하는 Wrap으로 설정됩니다.
// Create a texture sampler state description.
	samplerDesc.Filter = D3D11_FILTER_MIN_MAG_MIP_LINEAR;
	samplerDesc.AddressU = D3D11_TEXTURE_ADDRESS_WRAP;
	samplerDesc.AddressV = D3D11_TEXTURE_ADDRESS_WRAP;
	samplerDesc.AddressW = D3D11_TEXTURE_ADDRESS_WRAP;
	samplerDesc.MipLODBias = 0.0f;
	samplerDesc.MaxAnisotropy = 1;
	samplerDesc.ComparisonFunc = D3D11_COMPARISON_ALWAYS;
	samplerDesc.BorderColor[0] = 0;
	samplerDesc.BorderColor[1] = 0;
	samplerDesc.BorderColor[2] = 0;
	samplerDesc.BorderColor[3] = 0;
	samplerDesc.MinLOD = 0;
	samplerDesc.MaxLOD = D3D11_FLOAT32_MAX;

	// Create the texture sampler state.
	result = device->CreateSamplerState(&samplerDesc, &m_sampleState);

	return true;
}
4. SetShaderParameters
SetShaderParameters함수는 이제 텍스쳐 리소스에 대한 포인터를 가져온 다음 새 텍스쳐 리소스 포인터를 사용하여 셰이더에 할당합니다. 버퍼 렌더링이 발생하기 전에 텍스쳐를 설정해야 합니다.
bool TextureShaderClass::SetShaderParameters(ID3D11DeviceContext* deviceContext, XMMATRIX worldMatrix, XMMATRIX viewMatrix,
	XMMATRIX projectionMatrix, ID3D11ShaderResourceView* texture)
{
	/*----------------------------------------------*/
	// 상수 버퍼 Map, Unmap, VSSetConstantBuffers 과정
	/*----------------------------------------------*/

	// pixel shader에 shader texture resource를 배치합니다.
	deviceContext->PSSetShaderResources(0, 1, &texture);

	return true;
}
5. RenderShader
RenderShader함수는 렌더링 전에 Smaple state 설정을 픽셀 셰이더에 배치합니다.
void TextureShaderClass::RenderShader(ID3D11DeviceContext* deviceContext, int indexCount)
{
	// Set the vertex input layout.
	deviceContext->IASetInputLayout(m_layout);

	// Set the vertex and pixel shaders that will be used to render this triangle.
	deviceContext->VSSetShader(m_vertexShader, NULL, 0);
	deviceContext->PSSetShader(m_pixelShader, NULL, 0);

	// 픽셀 셰이더에 Texture sampler state를 배치합니다.
	deviceContext->PSSetSamplers(0, 1, &m_sampleState);

	// Render the triangle.
	deviceContext->DrawIndexed(indexCount, 0, 0);

	return;
}
TextureClass.h
TextureClass는 단일 텍스처 리소스의 로드, 언로드 및 액세스를 캡슐화합니다. 각 텍스쳐는 인스턴스화 된 이 개체가 필요합니다.
데이터를 더 쉽게 읽을 수 있도록 TargaHeader 구조체를 정의했습니다.
#pragma once
#include <d3d11.h>
#include <stdio.h>

class TextureClass
{
private:

    struct TargaHeader
    {
        unsigned char data1[12];
        unsigned short width;
        unsigned short height;
        unsigned char bpp;
        unsigned char data2;
    };

public:
    TextureClass();
    TextureClass(const TextureClass&) = default;
    ~TextureClass() = default;

    bool Initialize(ID3D11Device*, ID3D11DeviceContext*, char*);
    void Shutdown();

    ID3D11ShaderResourceView* GetTexture();

    int GetWidth();
    int GetHeight();

private:

    // Targa 읽기 기능
    bool LoadTarga32Bit(char*);

private:

    // 파일에서 직접 읽은 원시 Targa데이터
    unsigned char* m_targaData;
    // DirectX가 렌더링에 사용할 구조화된 텍스쳐 데이터
    ID3D11Texture2D* m_texture;
    // 셰이더가 그림을 그릴 때 텍스쳐 데이터에 액세스하는 리소스 장착 칸
    ID3D11ShaderResourceView* m_textureView;
    // 텍스쳐의 크기
    int m_width, m_height;
};
TextureClass.cpp
1. Initialize
이 함수는 먼저 Targa 데이터를 배열에 로드합니다. 그런 다음 텍스쳐를 생성하고 Targa 데이터를 올바른 형식으로 로드합니다. 즉, Targa 이미지 파일을 Dx 텍스쳐로 변환하는 기능을 합니다.
▼올바른 형식?
Targa 이미지 데이터는 파일의 시작 부분에 이미지의 맨 아래 행부터 저장됩니다.즉, 첫 번째 데이터는 이미지의 맨 아래쪽 픽셀에 해당하고, 마지막 데이터는 이미지의 맨 위쪽 픽셀에 해당합니다.
하지만 Dx11은 이미지 데이터를 위쪽에서 아래쪽으로 순서대로 읽기를 기대합니다
그래서 Targa 데이터를 뒤집어야 한다고 하는 것 입니다.
그런 다음 텍스쳐가 저장되면 Shader resource view를 생성합니다.
bool TextureClass::Initialize(ID3D11Device * device, ID3D11DeviceContext * deviceContext, char* filename)
{
	bool result;
	int height, width;
	D3D11_TEXTURE2D_DESC textureDesc;
	HRESULT hResult;
	unsigned int rowPitch;
	D3D11_SHADER_RESOURCE_VIEW_DESC srvDesc;

	// targa image data를 메모리에 저장합니다.
	result = LoadTarga32Bit(filename);
다음으로 Targa 데이터를 로드할 DirectX 텍스처에 대한 설명을 설정합니다. 설명이 완료되면 CreateTexture2D를 호출하여 빈 텍스처를 만듭니다. 다음 단계는 Targa 데이터를 빈 텍스처에 복사하는 것입니다.
	// Targa 이미지 데이터의 높이와 너비를 사용
	textureDesc.Height = m_height;
	textureDesc.Width = m_width;
	textureDesc.MipLevels = 0;
	textureDesc.ArraySize = 1;
	// 픽셀 형식을 32비트 RGBA 텍스처로 설정
	textureDesc.Format = DXGI_FORMAT_R8G8B8A8_UNORM;
	// SampleDesc를 기본값으로 설정합니다
	textureDesc.SampleDesc.Count = 1;
	textureDesc.SampleDesc.Quality = 0;
	textureDesc.Usage = D3D11_USAGE_DEFAULT;
	textureDesc.BindFlags = D3D11_BIND_SHADER_RESOURCE | D3D11_BIND_RENDER_TARGET;
	textureDesc.CPUAccessFlags = 0;
	textureDesc.MiscFlags = D3D11_RESOURCE_MISC_GENERATE_MIPS;

	// Create the empty texture.
	hResult = device->CreateTexture2D(&textureDesc, NULL, &m_texture);
여기서 우리는 Targa 데이터 배열을 DirectX 텍스처로 복사하기 위해 UpdateSubresource를 사용합니다.
이전 튜토리얼에서 기억하실지 모르겠지만, 우리는 ModelClass의 행렬을 행렬 상수 버퍼로 복사하기 위해 Map과 Unmap을 사용했습니다.
사실, 여기서도 우리의 텍스처 데이터를 Map과 Unmap으로 복사할 수 있었습니다.
일반적으로 Map과 Unmap을 사용하는 것이 UpdateSubresource를 사용하는 것보다 훨씬 빠르지만,
두 가지 로딩 방법 모두 특정한 목적이 있으며 성능상의 이유로 올바르게 선택해야 합니다.
추천 사항은 매 프레임마다 또는 매우 자주 다시 로드될 데이터에는 Map과 Unmap을 사용하라는 것 입니다.
반면, 한 번만 로드되거나 로딩 시퀀스 동안 드물게 로드되는 데이터에는 UpdateSubresource를 사용해야 합니다.
그 이유는 UpdateSubresource가 데이터를 고속 메모리에 넣어 캐시 유지 우선순위를 얻기 때문입니다.
이는 데이터가 곧 제거되거나 다시 로드되지 않을 것임을 알고 있기 때문입니다.
반면, Map과 Unmap은 DirectX가 곧 덮어쓸 것이라고 예상하기 때문에 메모리 위치를 캐시하지 않는 곳에 데이터를 넣습니다.
그래서 D3D11_USAGE_DEFAULT를 사용하면 DirectX에 UpdateSubresource를 사용하니 데이터가 자주 변경되지 않음을 알려주고, D3D11_USAGE_DYNAMIC을 사용하면 이 유형의 데이터가 일시적인 것임을 DirectX에 알립니다.
	// targa 이미지 데이터를 텍스처에 복사합니다.
	deviceContext->UpdateSubresource(m_texture, 0, NULL, m_targaData, rowPitch, 0);
텍스처가 로드된 후 셰이더에서 텍스처를 설정하기 위한 포인터를 가질 수 있는 셰이더 리소스 뷰를 생성합니다.설명에서 우리는 어떤 거리에서도 고품질 텍스처 렌더링을 위한 전체 Mipmap 수준 범위를 제공하는 두 가지 중요한 Mipmap 변수를 설정했습니다.
셰이더 리소스 뷰가 생성되면 GenerateMips를 호출하고 Mipmap이 생성됩니다. 그러나 원하는 경우 더 나은 품질을 찾고 있다면 자신의 Mipmap 레벨을 수동으로 로드할 수 있습니다.
	// shader resource view description를 설정합니다.
	srvDesc.Format = textureDesc.Format;
	srvDesc.ViewDimension = D3D11_SRV_DIMENSION_TEXTURE2D;
	srvDesc.Texture2D.MostDetailedMip = 0;
	srvDesc.Texture2D.MipLevels = -1;

	// 텍스쳐를 위한 shader resource view를 생성합니다.
	hResult = device->CreateShaderResourceView(m_texture, &srvDesc, &m_textureView);
	if (FAILED(hResult))
	{
		return false;
	}

	// 이 텍스쳐의 mipmaps을 만듭니다.
	deviceContext->GenerateMips(m_textureView);

	// Release the targa image data now that the image data has been loaded into the texture.
	delete[] m_targaData;
	m_targaData = 0;

	return true;
}
2. GetTexture
어느 셰이더나 렌더링하는데 필요로하는 Textrue view를 제공해주는 헬퍼 함수입니다.
ID3D11ShaderResourceView* TextureClass::GetTexture()
{
	return m_textureView;
}
3. LoadTarga32Bit
Targa 이미지 로딩 기능입니다. Targa 이미지는 거꾸로 저장되므로 사용하기 전에 뒤집어야 한다는 점을 다시 한 번 참고하세요. 따라서 여기서는 파일을 열고 배열로 읽은 다음 해당 배열 데이터를 가져와 올바른 순서로 m_targaData 배열에 로드하겠습니다.
우리는 의도적으로 알파 채널이 있는 32비트 Targa 파일만 다루고 있으며, 이 기능은 24비트로 저장된 Targa 파일을 거부합니다.
bool TextureClass::LoadTarga32Bit(char* filename)
{
	int error, bpp, imageSize, index, i, j, k;
	FILE* filePtr;
	unsigned int count;
	TargaHeader targaFileHeader;
	unsigned char* targaImage;


	// 바이너리 모드로 targa 파일을 엽니다.
	error = fopen_s(&filePtr, filename, "rb");
	if (error != 0)
	{
		return false;
	}

	// targaFileHeader 형식의 내용을 저장합니다.
	count = (unsigned int)fread(&targaFileHeader, sizeof(TargaHeader), 1, filePtr);
	if (count != 1)
	{
		return false;
	}

	// 헤더에서 중요한 정보를 가져옵니다.
	m_height = (int)targaFileHeader.height;
	m_width = (int)targaFileHeader.width;
	bpp = (int)targaFileHeader.bpp;

	// 32bit Targa 이미지인지 확인합니다.
	if (bpp != 32)
	{
		return false;
	}

	// 32bit 이미지의 데이터 크기를 계산합니다.
	imageSize = m_width * m_height * 4; // 각 픽셀이 4바이트이기 때문에 4를 곱해줍니다.

	// Targa 이미지 데이터를 저장할 메모리를 할당합니다.
	targaImage = new unsigned char[imageSize];

	// Targa 이미지 데이터를 읽어옵니다.
	count = (unsigned int)fread(targaImage, 1, imageSize, filePtr);
	if (count != imageSize)
	{
		return false;
	}

	// 파일을 닫습니다.
	error = fclose(filePtr);
	if (error != 0)
	{
		return false;
	}

	// targa destination data를 위한 메모리 할당을 합니다.
	m_targaData = new unsigned char[imageSize];

	// 우리의 빈 텍스쳐가 채워지기 시작할 인덱스 입니다.
	index = 0;

	// Targa 텍스쳐를 탐색하기 시작할 인덱스 입니다.
	k = (m_width * m_height * 4) - (m_width * 4);

	// targa 이미지 데이터를 올바른 순서로 targa 대상 배열에 복사합니다.
	for (j = 0; j < m_height; j++)
	{
		for (i = 0; i < m_width; i++)
		{
			m_targaData[index + 0] = targaImage[k + 2];  // Red.
			m_targaData[index + 1] = targaImage[k + 1];  // Green.
			m_targaData[index + 2] = targaImage[k + 0];  // Blue
			m_targaData[index + 3] = targaImage[k + 3];  // Alpha

			// targa 데이터에 대한 인덱스를 증가시킵니다.
			k += 4;
			index += 4;
		}

		// targa 이미지 데이터 인덱스를 거꾸로 읽어서 열 시작 부분의 이전 행으로 다시 설정합니다.
		k -= (m_width * 8);
	}

	// 대상 배열에 복사되었으므로 이제 targa 이미지 데이터를 해제합니다.
	delete[] targaImage;
	targaImage = 0;

	return true;
}
ModleClass.h
이제 TextureClass가 ModelClass에 포함됩니다.
	// 1. 구조 변경
	struct VertexType
	{
		XMFLOAT3 position;
		XMFLOAT2 texture;
	};

	// 2. 함수 추가
	ID3D11ShaderResourceView* GetTexture();
	// 텍스쳐 불러오기
	bool LoadTexture(ID3D11Device*, ID3D11DeviceContext*, char*);
	// 텍스쳐 해제
	void ReleaseTexture();

	// 3. 변수 추가
	//m_Texture는 이 모델의 텍스처 리소스를 로드, 해제 및 액세스하는 데 사용됩니다.
	TextureClass* m_Texture;
ModelClass.cpp
1. Initialize
매개변수가 추가 됐습니다.
// DeviceContext*와 char* 매개변수가 추가 됐습니다.
bool ModelClass::Initialize(ID3D11Device* device, ID3D11DeviceContext* deviceContext, char* textureFilename)
{
	bool result;

	result = InitializeBuffers(device);

	// 이 모델의 텍스쳐를 불러옵니다.
	result = LoadTexture(device, deviceContext, textureFilename);

	return true;
}
2. InitializeBuffer
정점 데이터를 color에서 texture로 수정합니다.
bool ModelClass::InitializeBuffers(ID3D11Device* device)
{

	///////////////////////////////////////////////////////////////////////////////
	// Vertex Buffer 생성
	///////////////////////////////////////////////////////////////////////////////
	{
		m_vertexCount = 4;
		// Create the vertex array.
		vertices = new VertexType[m_vertexCount];

		// Load the vertex array with data. (x, y, z)
		vertices[0].position = XMFLOAT3(-1.0f, 1.0f, 0.0f);  // Top left.
		vertices[0].texture = XMFLOAT2(0.0f, 0.0f);

		vertices[1].position = XMFLOAT3(1.0f, 1.0f, 0.0f);  // Top right
		vertices[1].texture = XMFLOAT2(1.0f, 0.0f);

		vertices[2].position = XMFLOAT3(-1.0f, -1.0f, 0.0f);  // Bottom left.
		vertices[2].texture = XMFLOAT2(0.0f, 1.0f);

		vertices[3].position = XMFLOAT3(1.0f, -1.0f, 0.0f);  // Bottom right.
		vertices[3].texture = XMFLOAT2(1.0f, 1.0f);

		/*----------------------------------------------*/
		// 생략
		/*----------------------------------------------*/
}
3. LoadTexture
이 함수는 텍스쳐 개체를 생성한 후 제공된 파일 이름으로 초기화하는 새로운 함수입니다. 이 함수는 초기화 중 호출됩니다.
bool ModelClass::LoadTexture(ID3D11Device* device, ID3D11DeviceContext* deviceContext, char* filename)
{
	bool result;

	// TextureClass개체를 생성하고 초기화 합니다.
	m_Texture = new TextureClass;

	result = m_Texture->Initialize(device, deviceContext, filename);

	return true;
}
4. ReleasTextrue
LoadTexture함수로 생성된 TextureClass개체를 해제 합니다.
void ModelClass::ReleaseTexture()
{
	// Release the texture object.
	if (m_Texture)
	{
		m_Texture->Shutdown();
		delete m_Texture;
		m_Texture = nullptr;
	}

	return;
}
ApplicationClass.h
// 삭제 됩니다.
//#include "ColorShaderClass.h"
// 추가 됩니다.
#include "TextureShaderClass.h"


class ApplicationClass
{
private:
	// private 멤버 변수가 삭제됩니다.
	//ColorShaderClass* m_ColorShader;

	// private 멤버 변수가 추가됩니다.
	TextureShaderClass* m_TextureShader;
}
ApplicaitionClass.cpp
1. Initialize
bool ApplicationClass::Initialize(int screenWidth, int screenHeight, HWND hwnd)
{
	// 텍스쳐 파일의 이름을 저장할 버퍼
	char textureFileName[128];

    // ....

    // 우리가 불러올 텍스쳐 파일의 이름을 세팅합니다.
	strcpy_s(textureFileName, "stone01.tga");
	result = m_Model->Initialize(m_Direct3D->GetDevice(), m_Direct3D->GetDeviceContext(), textureFileName);

    // TextureShaderClass의 개체를 생성, 초기화 합니다.
	m_TextureShader = new TextureShaderClass;
	result = m_TextureShader->Initialize(m_Direct3D->GetDevice(), hwnd);

    // ....
}
2. Render
bool ApplicationClass::Render()
{
	// ....

	// TextureShaderClass를 사용하여 모델을 렌더링 합니다.
	result = m_TextureShader->Render(m_Direct3D->GetDeviceContext(), m_Model->GetIndexCount(), worldMatrix, viewMatrix, projectionMatrix, m_Model->GetTexture());
	if (!result)
	{
		return false;
	}

	// 렌더링된 장면을 화면에 표시한다.
	m_Direct3D->EndScene();

	return true;
}
요약
텍스쳐 불러오기, 이를 폴리곤에 매핑한 다음 셰이더를 사용하여 렌더링하는 기본을 배웠습니다.
초기화
- TextureShaderClass
1. 셰이더 컴파일 및 개체 GPU에 생성
2. 색상 대신 uv좌표값으로 Input layout 초기화
3. 상수 버퍼 생성
4. Sampler state 생성 - TextureClass
1. char* 형으로 Tga이미지 뒤집어 가져오기
2. Texture2D형 GPU에 생성하여 UpdateSubresource으로 GPU에 복사하여 넣어주기
3. Shader resoruce view 생성하면서 만든 Texture2D를 장착시켜준다.
업데이트(Render)
- TextureShaderClass
1. Set ShaderParameters
- 상수 버퍼 Map/Unmap으로 업데이트 후 VS에 배치,
- Shader resoruce view를 TextureClass에서 받아와 PS단계에 배치
- InputLayout IA단계 배치, 셰이더 각 단계에 배치,
- ID3D11SamplerState PS에 배치
- TextureClass
1. TextureShaderClass에서 ShaderResourceView를 가져갑니다.
내 생각에 중요했던 것
1. CreateTexture2D
CreateTexture2D로 텍스쳐를 생성하면 GPU에 생성이 되고 그 포인터를 받아오는 것.
근데 이전에 있던 튜토리얼에서도 무언가 GPU에 생성이 되고 그 포인터를 받아오는 게 꽤 많았는데
사실은 GPU의 쌩 주소를 받아오는게 아니라 GPU의 특정 데이터 영역과 매핑된 RAM의 주소를 받아오는 것이라고 한다!
왜냐면 GPU가 사용하는 메모리 주소는 CPU가 직접 접근할 수 없기 때문!
그래서 MAP을 호출하게 되면 GPU의 메모리를 RAM에 매핑하여서 그 RAM의 주소를 반환하는 것이였다!
2. Map / Unmap & UpdateSubresource
| 특징 | Map/Unmap | UpdateSubresource |
| 주요 사용 상황 | 매 프레임마다 자주 업데이트되는 데이터 | 초기화 또는 자주 변경되지 않는 데이터 |
| 접근 방식 | CPU가 직접 GPU 메모리에 접근 | CPU 메모리에서 GPU 메모리로 복사 |
| 성능 | 빠르지만 신중하게 사용해야 함 | 최적화된 방식으로 빠르게 복사 |
| 예시 | 동적 버퍼, 임시 데이터 | 텍스처 초기화, 정적 버퍼 |
이게 특징은 뭐 그런가보다.. 하고 알겠는데 왜 그런지는 잘 이해가 가지 않는다.
그냥 Map/Unmap이 빠르니까 다 이거 쓰면 되는거 아님? 라는 생각도 있고 한데
UpdateSubresource는 좀 느리지만 무언가 GPU와 가장 가까운 메모리에 최적화로 쑤셔 넣기때문에 쓴다는 느낌..?
나중에 좀 더 알아봐야겠다.
용어 정리
텍셀 좌표계 : 픽셀로 된 텍스쳐의 크기를 0.0f 에서 1.0f 사이의 값으로 정규화 하여 사용하는 좌표계
텍스처 : 2D 이미지 데이터
샘플링 : 특정 위치에서 데이터를 추출하는 과정
Sampler State : 텍스처 샘플링(특정 위치에서 색상을 추출) 방법을 정의하는 설정
mip level sampling : 텍스쳐의 다양한 해상도들을 미리 계산하여 저장하고 렌더링시 적절한 해상도의 텍스쳐를 선택해 사용하는 방법
ShaderResourceView : 셰이더가 접근할 수 있는 리소스 장착 칸.
셰이더가 텍스쳐와 같은 리소스를 읽어올 수 있도록 연결해주는 인터페이스
Pitch : 한 줄의 픽셀 데이터가 차지하는 메모리의 바이트 수.
예시로 가로 3, 세로 12 인 8비트 이미지가 있으면, 가로 하나의 픽셀 수는 3이다.
그럼 8비트 이미지니까 1픽셀당 8비트가 있으므로 가로 하나의 메모리는 3 * 8 = 24비트 = 3바이트라 할 수 있다.
bpp : "Bits Per Pixel"의 약어로, 한 화소(픽셀)를 표현하는 데 필요한 비트 수를 나타냄